Patio Chandelier Project

/
0 Comments
Thats what we like to do...take old things and make them new with a little cleaning, a little paint or something small that makes it new again :)


This project was something I couldn't wait to see finished! My Dad was in town from the DC area and was helping me with some projects while Joe was at work this weekend! [Best.Dad.Ever. :) ]


Here she is before...
and here she is after!

Here is what we did:


1. First took off the bottom part of the chandelier,
took out the glass pieces and wiped it down with a damp rag
.
2. I took the white cylinders that make it look like candlesticks
and washed them up with soap n water to make them white again!
3. While I was inside washing the cylinders, Dad
taped over the area where the bulb screws in to
keep from paint getting on the inside.
4. Tape off around the base of your light fixture to keep
from spray paint getting everywhere and giving it an unclean look.
We used masking tape and then taped newspapers
around the area to make sure the overspray didn't get on the vinyl.
Then we started spray painting!
We are using Rust-Oleum High Gloss Black Spray Paint.
(best.spray.paint.for.exterior.)
Looking good so far!
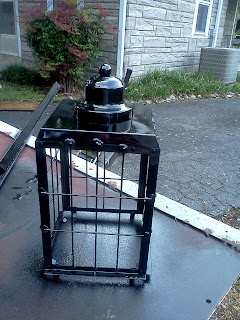
Here is the bottom of the chandelier.
We used two thin coats.
Then after a couple hours of drying time, you are ready to hang it back up!
(I couldn't take pictures of this part. I was holding up the bottom part of the chandelier as Dad use the screwdriver to put the screws back in) ;)

Yes! It worked perfectly!!!!
Yet another project I am in love with!
It's so nice to work on projects with family :)
It's a great way to spend time together!

More of this weekends "family house projects" to post soon!


You may also like

No comments:

Powered by Blogger.

We LOVE our followers!