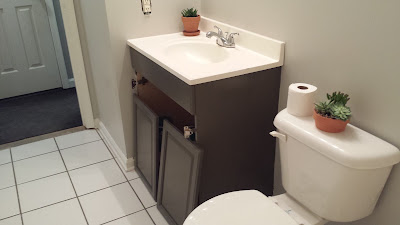
Oh guys, I'm so excited to share something from the house ahhh! So we are making a lot of progress over there and today was day 16 of the house renovation-woot woot! Here is the progress we have made so far on the upstairs bathroom....
Before
Progress as of 6/24/15
Before
Before
Progress as of 6/24/15
Here is what we did:

  • Cleaned the walls/doors/ceilings with vinegar, baking soda & hot water to clean off the dust & cigarette smoke
  • Removed the baseboard heater
  • Removed all hardware
  • Filled all holes, dents & where the baseboard heater was removed with mud & sanded all walls
  • Primed all walls, ceilings & cabinet
  • Painted the ceiling (Sherwin Williams Greek Villa)
  • Painted the walls (Sherwin Williams Repose Gray)
  • Painted the trim (Sherwin Williams Greek Villa)
  • Painted the cabinet (Sherwin Williams Porpoise)

I have new handles for the cabinet that I'm super excited about & plans for the mirror which you can't see in these pictures haha. Can't wait to get some hardware back in & decorate this room. I had to add my sweet succulents for now ;)

Leave us some love in the comments! <3


Yes, just do it. Even once a year is better than nothing! 

Why???

Hey, you asked!
I use baking soda & vinegar together. Takes the grime & stains off!
Now you are wondering how yours looks...
It's a white fridge!?!
Basic Refrigerator Cleaner Recipe:

16 oz Spray Bottle
8 oz Warm Water
8 oz White Vinegar
1 tsp Baking Soda

You can use this on the inside & outside of your refrigerator. For tougher jobs, sprinkle baking soda right onto a cloth that has the vinegar mixture on it and scrub in circular motions. Natural cleaning at it's finest!


We are officially homeowners!!!!!


....and we are up to our eyeballs in the cleaning process. There isn't much to see yet just cause it's all vinegar, baking soda, mops and rags right now. Today was day 2 and we are close to being done with getting the upstairs smoke/dust/grime free! Unbelievable work getting the smoke out but the vinegar is working super well. Totally recommend it. Basically a 1:1 ratio with diluting white vinegar to hot water. We are using a sponge mop to scrub the ceilings and walls, then using rags to wipe down the brownish yellow drips and going over it again with clean water and vinegar mixture again. The places that are the worst needed 4 times going over and a little added baking soda but they are as clean as possible and ready for the next step.

Here are a few pictures I snapped while we were over there! 
Joe is the man. He will get the grass to grow and he owned
a landscape company in Nashville, TN. Soooo he will
totally do some amazing landscaping! :D

The windows are pretty darn dirty
Mopping the walls...weird sounding but works
really well to get them scrubbed! :)
This one side of the cabinet....just the side

THIS. Wowzers ya'll. Hello smoke & grease.

Well ya'll, that's it for now. Not much yet but get ready....I'm searching for bathroom flooring. We got our other flooring picked out and I'm finalizing paint colors. The super fun part!!!!

-Laura
Today we were supposed to close on our new house, but like most closings...it got moved to sometime before May 8th. So we shall see...
In the meantime, I worked on this DIY project for a event at my church to show while talking about DIY Furniture.

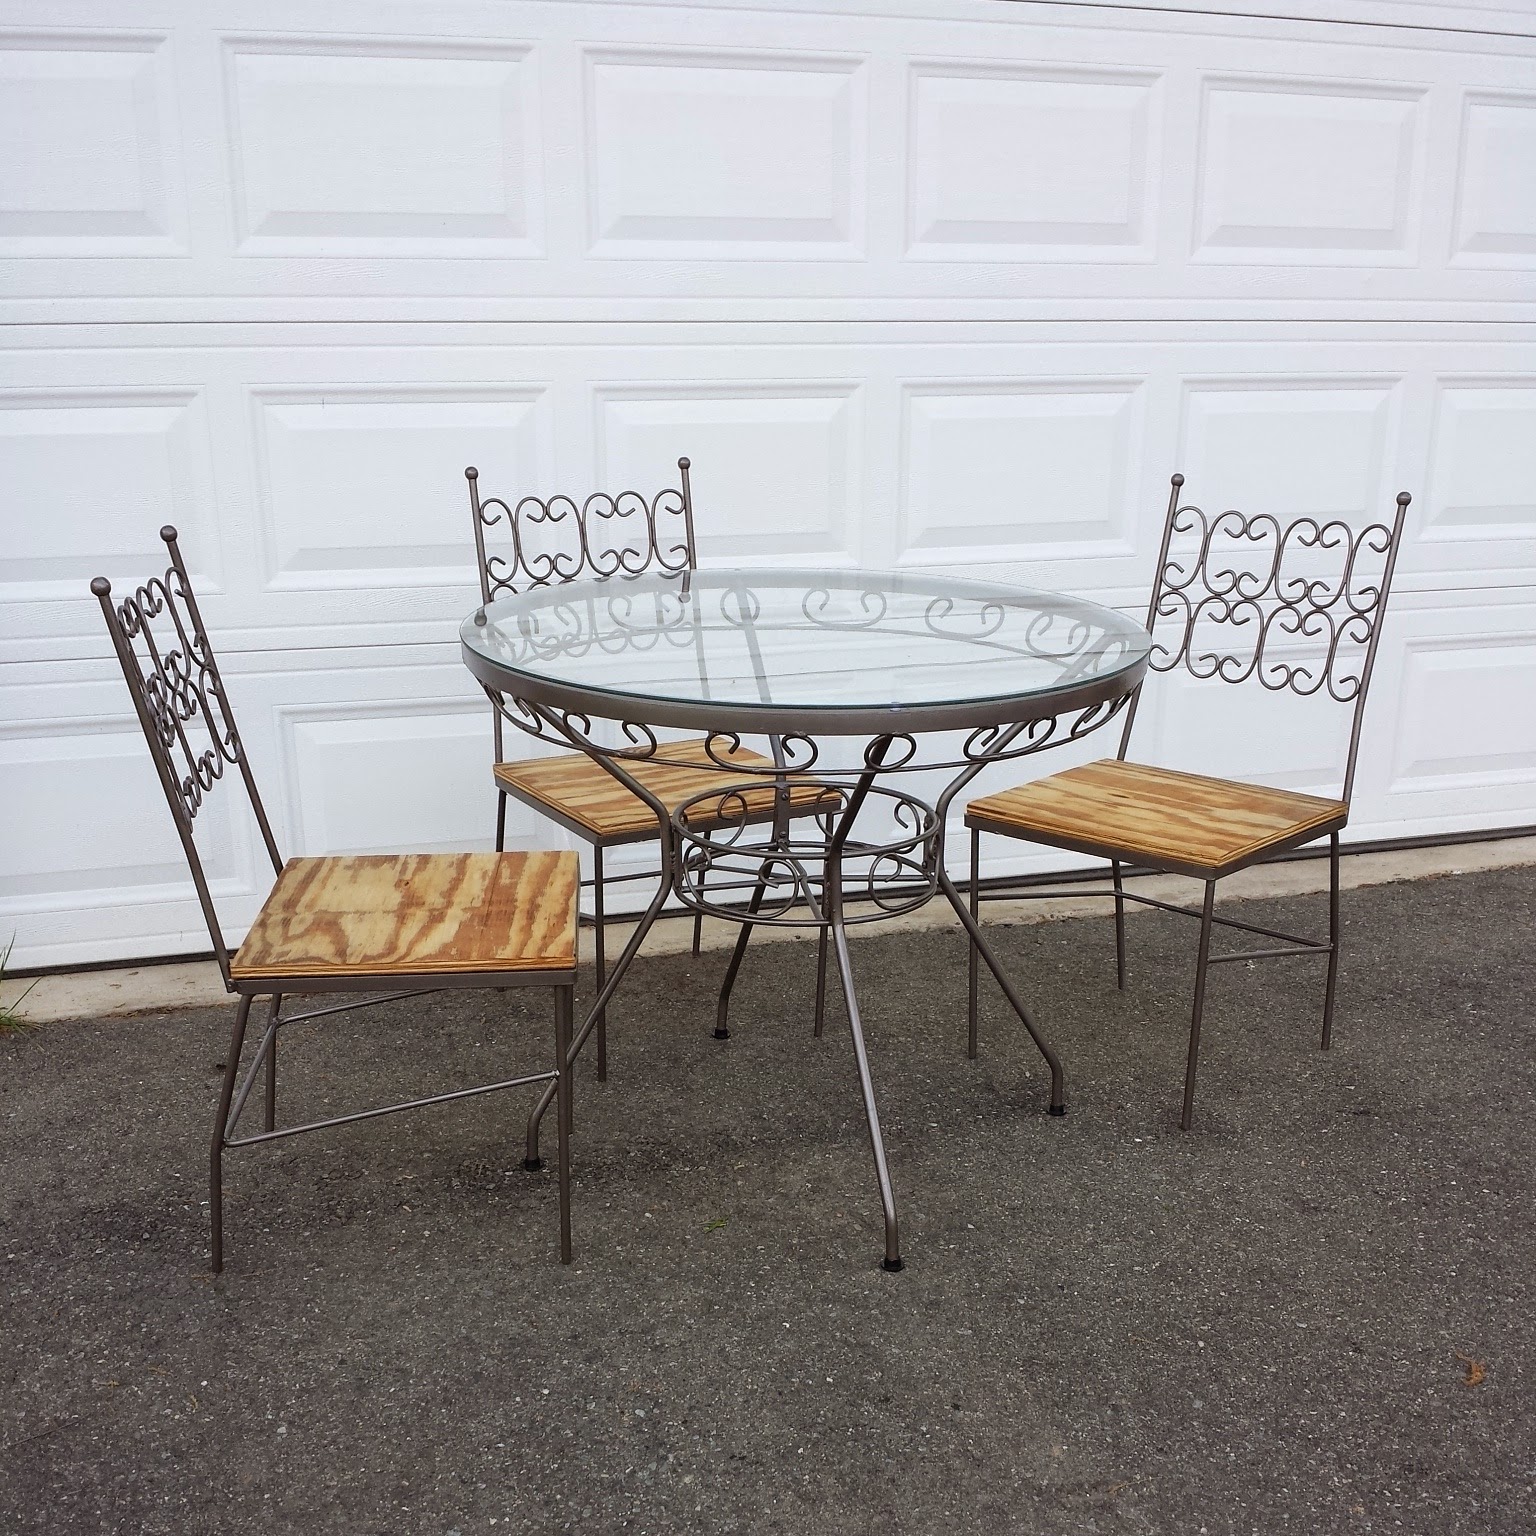
So, I got this set for free! Yay! It did not have seats and it wasn't pretty but I took it cause it had glass and the 3 chairs and I love the backs of the chairs. Plus it didn't need any other repairs besides figuring out the seat dilemma and a little color haha!


I wanted to document what I did for you. So I took a few pictures along the way...

First step was sanding down everything to get this peeling paint off and give a smooth surface to apply the spray paint.


After sanding and using a cloth to wipe dust off, we spray painted! This
spray paint is amazing. It's by Rust-Oleum "Hammered" Dark Bronze


The plywood I got was a extra piece sitting in my Moms garage and had some staples in it that needed to be removed.
This was taken after we cut the plywood down to size.


Sanding the plywood down for a smooth finish and to remove imperfections from the wood.

After sanding the plywood. 
Ahhh getting excited!!!
Since these chairs are going to be outdoors and the seats are plywood we had
to apply a water sealer. We chose Thompsons Water Sealer. A couple coats do
the trick, but you do have to keep these out of rain for the first 24 hours afterwards.

Marking the places on the board where we will attach to the seat
using screws. Thankfully the seats already had the metal hole for
the seat to attach easily with just a couple screws. No need to buy
extra hardware and figure out how to attach the seat to the
metal frame!


Now to remember how it looked BEFORE the love.
Ahhh I just LOVE how this set turned out. A little industrial feel with the wood seats and it won't show dirt with the bronze color paint! I may have sewn a couple throw pillows for added comfort and to add color for summer ;)


I am so excited to take this over to our new house and put it to good use! For now, it sits and waits to go in my garage :)
Have you taken on a patio furniture project? I would love to see pictures of your project!!

-Laura
We have picked out our flooring and color palette for our new house. Excited is an understatement.

Sherwin Williams have the most beautiful color palettes! We picked ours up from Lowes. It's a great tool for shopping and keeping color flow throughout your house. We chose the "Urban" palette.

The laminate wood flooring is from Lumber Liquidators. "Antique Acacia" is the look we chose.


I love that both of us like the urban-industrial style with a few touches of other things as well. May 1st we start cleaning smoke from the walls and pulling up the tile & carpet!

p.s. totally thinking of painting our entertainment center the electric blue color! 
Hey guys!!! I am so ecstatic to share that we are back to our house projects! After a few year hiatus, we are more than ready to be going at this again. We are in VA still and have an adorable 10 month old boy and close on our new house on April 30th!

This is going to be AWESOME.

We are picking out flooring this weekend and looking at paint colors. Right now I'm sort of jello set on these things...

Home Depot has TrafficMaster Saratoga Hickory Laminate Wood Flooring that is simply beautiful and from what I read in the reviews-great product for a low price! I love the darkness and that it has the hand scraped look. The only thing we are concerned with is that it's not very thick...I got a sample of a different color but same brand and thickness, we shall see if it passes the tests we take it through ;) 

Benjamin Moore has a paint color that is pretty popular and so pretty. It's called Revere Pewter. With dark wood floors and bright white trim and black doors. It will be so rich and cozy! 

Tomorrow we are going to check out a couple other places for flooring so we can get a good product at a great price. Can't wait to show ya some of our finds!

Close Date: 21 days & counting!

j&L

p.s. here is a sneak peek of the fixer upper split level home in the woods. we WILL get grass to grow hahaha!


Powered by Blogger.

We LOVE our followers!